If you play Roblox games quite a while, you should know what is “Game Pass”. In this tutorial, I would like to share with you how to make a Roblox game pass. It will not be complicated, just 10-15 minutes maximum. And then you will be able to start earning Robux from your game! (Or you can ask your friend to donate 🙂
What is Game Pass in Roblox?
A game pass is a special perk you sell in your game. Let me give you some example, VIP badge, a cool pet, or extra coins, we call it Game Pass. By promoting your game pass, you can monetize (meaning making Robux) your games and earn tons of Robux.
Also, you can offer players awesome extra features. For example, a speed boost or a shiny sword or even a pass to access the secret zone. So in this guide, I will walk you through step by step to create and add a game pass to your Roblox game. Count on me, it’s super easy! Even if you’re newbie to Roblox Studio. Let’s get started.
What can you sell in Roblox?
A game pass is a special perk you sell in your game. Let me give you some example, VIP badge, a cool pet, or extra coins, we call it Game Pass. By promoting your game pass, you can monetize (meaning making Robux) your games and earn tons of Robux.
Also, you can offer players awesome extra features. For example, a speed boost or a shiny sword or even a pass to access the secret zone. So in this guide, I will walk you through step by step to create and add a game pass to your Roblox game. Count on me, it’s super easy! Even if you’re newbie to Roblox Studio. Let’s get started.
Roblox Game Pass Scripting Sample
In order to help you know how to make a game pass, I will show you an simple example for demonstration:
local Players = game:GetService("Players")
local MarketplaceService = game:GetService("MarketplaceService")
local ReplicatedStorage = game:GetService("ReplicatedStorage")

local player = Players.LocalPlayer
local gamePassId = 12345678 -- Replace this with your real Game Pass ID
local vipTool = ReplicatedStorage:WaitForChild("VIPTool")

-- Prompt purchase after some conditions
MarketplaceService:PromptGamePassPurchase(player, gamePassId)
First we gets the Players service. Why this is important? It allows you to access player-related info like the current player, their data and the interactions. Next, we need the MarketplaceService. This build in service in Roblox Studio is super important. The main responsibilities of this service is used to handle Game Passes, Developer Products, and other purchases in Roblox. We will keep using it coming.
And then the ReplicatedStorage service. I have shared quite a lot about this service in another tutorial teaching you about how to add backpacks. You can refer to that step by step guide. Basically, it’s a special container used to store shared objects (like tools, models, scripts). You just need to remember both server and client can access to this special container.
Extra Tips for the scripts
After that, you should get the local player (the one playing your game!). One thing you should be noted, the script only work in LocalScript. The reason is only LocalScript can access LocalPlayer. Follow by create a local variable and store the ID number of your game pass. I will show you later how to get that ID number.
Using the ReplicatedStorage service retrieve a tool you want for selling, and assign it to the local variable vipTool for example. Finally, by certain condition you set, for example, after user click a buy button, using the script by passing player and gamePassId as parameter, a popup will be shown to ask if the player want to buy the game pass:
MarketplaceService:PromptGamePassPurchase(player, gamePassId)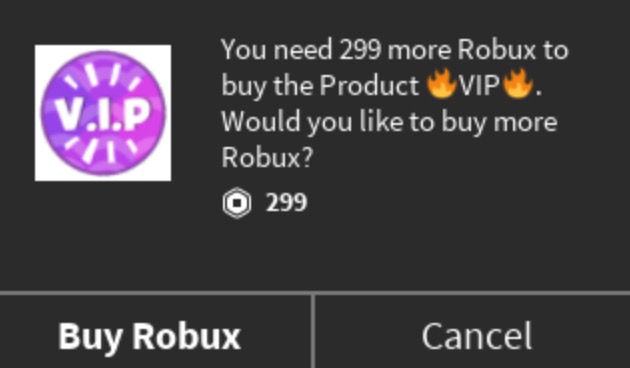
How to create a Game Pass ID in Roblox account?
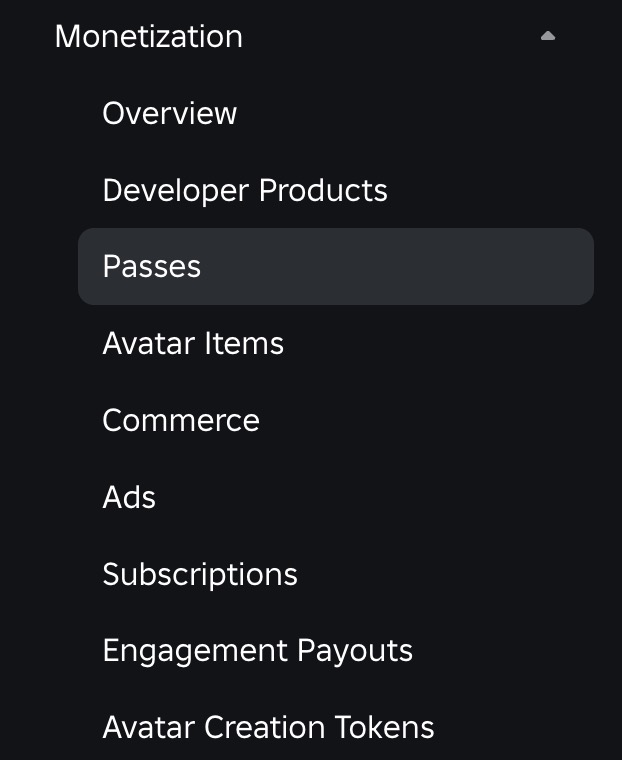
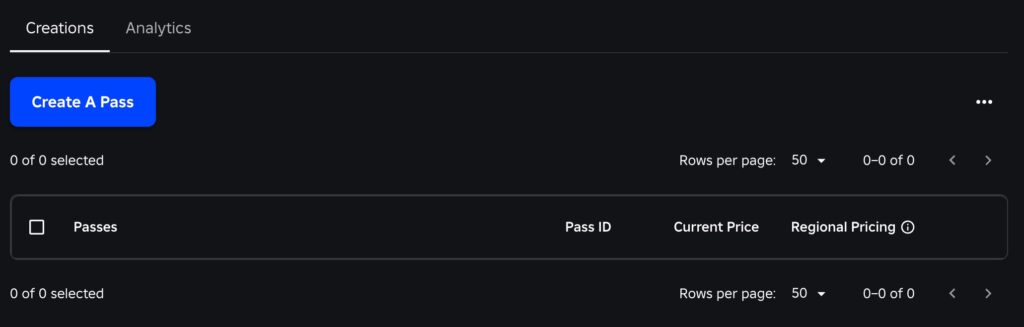
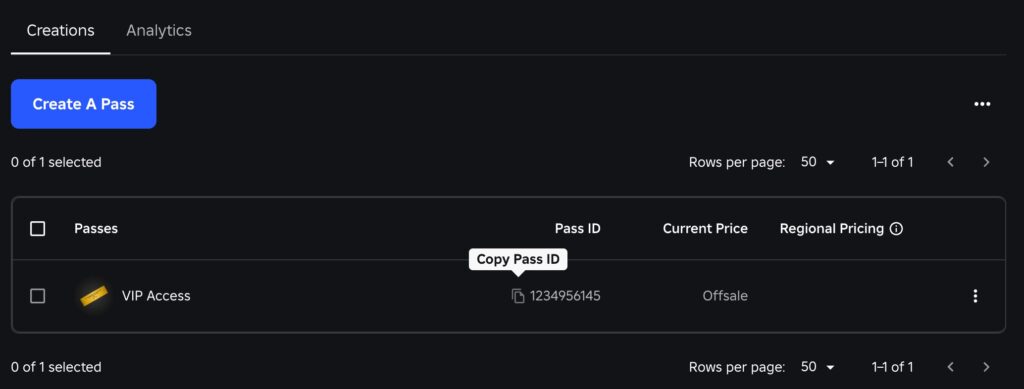
So the next question is: How to make a game pass ID? It’s simple. Just go to the browser, login to the Roblox.com. The first step is to click “Create” at the top and find your game under “Creations”. (Yes, you must publish the game first before you can make a pass. Just read another simple tutorial if you don’t know how to publish a game in Roblox, it’s super easy!). Follow the “Passes” and then “Create a Pass”


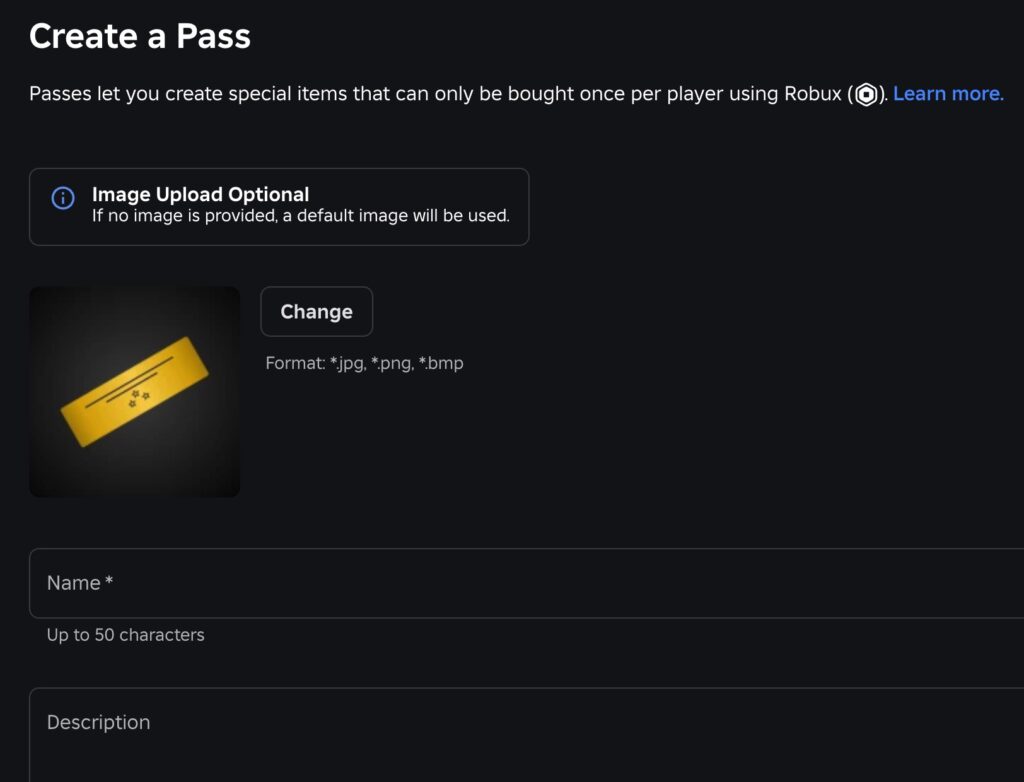
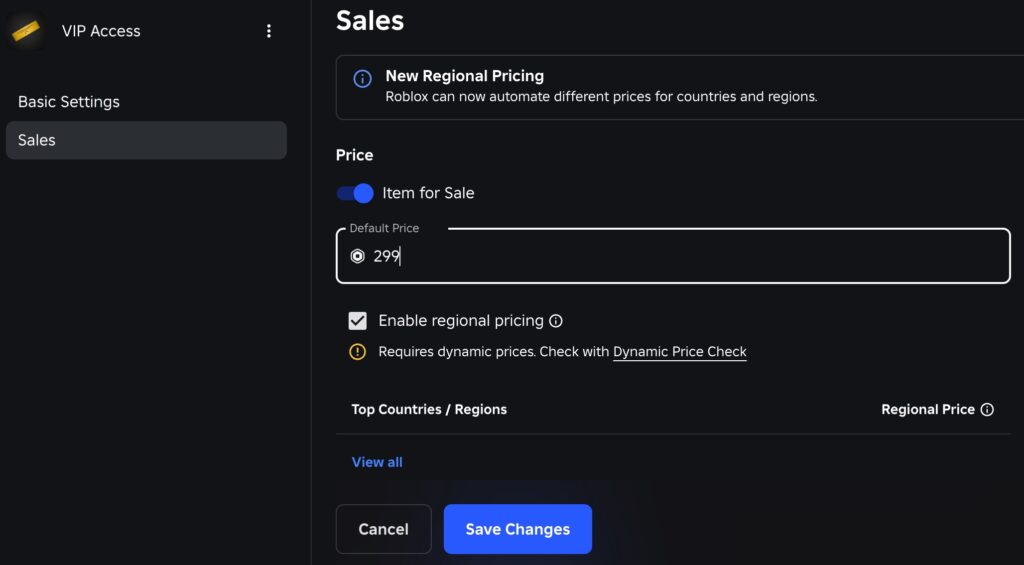
Finally, you just need to upload an image of the pass, or using the default image. Finally, you should be able to copy the pass asset ID. Noted that you can click into the pass and then set the sale price. For example, you can charge 299 Robux for the VIP Access. So, now you can copy the ID and paste into you LUA scripting!


I’ve played this for a couple hours and so far, it’s the best Lego game I’ve played. It feels so much better than the older ones with mumbling.
This is so good to hear and I am so ready for this game!